Day: June 28, 2025

  • Getting Started with FastAPI: A Beginner’s Guide

    Getting Started with FastAPI: A Beginner’s Guide

    FastAPI has quickly become one of the most popular frameworks for building APIs with Python, thanks to its speed, ease of use, and meticulous design. If you’re a developer looking to dive into FastAPI for the first time, this guide will help you get started.

    Why FastAPI?

    FastAPI is highly performant, as it’s built on top of Starlette for the web parts and Pydantic for the data parts. It offers automatic interactive API documentation with Swagger UI and ReDoc, which can significantly ease the development process. FastAPI is also designed to deliver high performance and is asynchronous by nature, making it an excellent choice for handling a large number of concurrent requests.

    Setting Up Your Environment

    Before you start using FastAPI, make sure you have Python 3.6+ installed on your system. You can check your Python version with the following command:

    python --version
    

    Once Python is set up, you can install FastAPI and an ASGI server like uvicorn using pip:

    pip install fastapi uvicorn
    

    Creating Your First API

    Let’s create a simple API that returns a greeting. Save the following code in a file named main.py:

    from fastapi import FastAPI
    
    app = FastAPI()
    
    @app.get("/")
    async def read_root():
        return {"Hello": "World"}
    

    This snippet creates a FastAPI instance and defines a single route (/) that returns a JSON object. To run this server, execute the following command:

    uvicorn main:app --reload
    

    Visit http://127.0.0.1:8000 in your browser, and you should see:

    {
      "Hello": "World"
    }
    

    Interactive Documentation

    One of the standout features of FastAPI is its automatically generated interactive documentation. You can access it by navigating to http://127.0.0.1:8000/docs. FastAPI also provides ReDoc documentation at http://127.0.0.1:8000/redoc.

    Conclusion

    FastAPI is a powerful tool for building APIs with Python, offering both high performance and ease of use. This quick-start guide gives you a taste of what you can do with FastAPI. As you continue exploring, you’ll discover more of its features and capabilities, such as handling path and query parameters, request validation, and complex data structures.

    Stay tuned for more articles where we’ll dive deeper into these topics and more!

    Happy coding!

  • Mastering Dependency Injection in FastAPI: A Step-by-Step Guide

    Mastering Dependency Injection in FastAPI: A Step-by-Step Guide

    Introduction

    FastAPI has rapidly gained popularity in the world of Python for its speed, intuitiveness, and powerful features. One such feature is Dependency Injection (DI), which allows for cleaner and more modular code. In this article, I’ll walk you through the fundamentals of using Dependency Injection in FastAPI, helping you to build scalable and maintainable APIs effectively.

    What is Dependency Injection?

    Dependency Injection is a software design pattern that allows for the separation of concerns, making modules loosely coupled. Instead of creating dependencies directly inside a module, they are "injected" into the module from external sources. This pattern improves code readability, testing, and maintenance.

    Why Use Dependency Injection in FastAPI?

    FastAPI’s DI system is built with simplicity and efficiency in mind. It allows you to:

    • Reuse Code Easily: Functions and classes can be reused across your application without redundant code.
    • Enhance Testing: Mocking dependencies becomes straightforward, as DI allows the swift replacement of real services with mock services in tests.
    • Improve Organization: Dependencies are declared at one place, which enhances the overall architecture of an application.

    Implementing Dependency Injection in FastAPI

    Let’s look at a basic example of DI in FastAPI. Consider a function that requires a database connection:

    from fastapi import FastAPI, Depends
    
    app = FastAPI()
    
    def get_db():
        db = "Fake Database Connection"
        try:
            yield db
        finally:
            print("Closing database connection")
    
    @app.get("/items/")
    async def read_items(db=Depends(get_db)):
        return {"db": db}
    

    Explaining the Code

    • Dependency Function get_db(): This simulates a database connection. It uses a Python generator, allowing setup and teardown logic around the yield keyword.

    • Using Depends: The Depends() call tells FastAPI to use the get_db function whenever the read_items endpoint is called. FastAPI takes care of calling the dependency function and managing its lifecycle.

    Advanced Usage

    FastAPI supports injecting classes, handling errors, and providing custom scopes for dependencies. Here’s a quick look at class-based dependency injection:

    class Settings:
        def __init__(self):
            self.value = "Settings Value"
    
    @app.get("/settings/")
    async def get_settings(settings: Settings = Depends()):
        return {"Settings": settings.value}
    

    This approach encapsulates complex initialization logic in the class constructor, making it reusable and injectable throughout your FastAPI application.

    Conclusion

    Dependency Injection in FastAPI encourages cleaner, more organized code by clearly defining how components of your application interact with each other. As a software engineer focusing on backend development, mastering this pattern can significantly enhance the way you build web APIs with FastAPI.

    Experiment with these examples, start integrating DI into your own projects, and see the difference it makes in terms of code quality and maintainability. Happy coding!

  • Mastering Dependency Injection in FastAPI

    Mastering Dependency Injection in FastAPI

    Introduction

    FastAPI is renowned for its high performance and intuitive API design, which leverages Python’s type hints heavily. One of the most powerful features FastAPI offers is Dependency Injection. This feature helps structure your application with separate and testable components, facilitates code reuse, and enhances dependency management.

    What is Dependency Injection?

    Dependency Injection (DI) is a technique where you provide the dependencies of a class or function at runtime rather than at compile time. It allows a higher level of flexibility and decoupling in your code. In FastAPI, DI is applied through its dependency declaration system that uses Python’s standard type hints to inject dependencies automatically.

    The Basics of Dependency Injection in FastAPI

    In FastAPI, you can use the Depends function to declare a dependency. Here’s a simple example to help you understand how it works:

    from fastapi import FastAPI, Depends
    
    app = FastAPI()
    
    def common_parameters(q: str = None, skip: int = 0, limit: int = 10):
        return {"q": q, "skip": skip, "limit": limit}
    
    @app.get("/items/")
    async def read_items(commons: dict = Depends(common_parameters)):
        return commons
    

    In this snippet, common_parameters is a reusable dependency function that you can inject into any endpoint using Depends.

    Advanced Usage

    FastAPI supports more advanced DI features, such as:

    Sub-dependencies

    Dependencies can have their own dependencies:

    from fastapi import Header
    
    async def verify_token(x_token: str = Header(...)):
        if x_token != "expected-token":
            raise HTTPException(status_code=400, detail="Invalid X-Token header")
    
    @app.get("/secure-items/")
    async def secure_items(token: str = Depends(verify_token)):
        return {"message": "Successfully accessed secure items."}
    

    Class-based Dependencies

    You can also use classes for dependencies, which is useful for managing state across requests:

    class CommonQueryParams:
        def __init__(self, q: str = None, skip: int = 0, limit: int = 10):
            self.q = q
            self.skip = skip
            self.limit = limit
    
    @app.get("/class-based-items/")
    async def read_items(commons: CommonQueryParams = Depends()):
        return commons
    

    Benefits of Using Dependency Injection

    • Reusability: Write once, use across multiple endpoints.
    • Single Responsibility Principle (SRP): Dependencies can cleanly separate concerns.
    • Testability: Allows easier mocking and testing as complex dependencies can easily be swapped.
    • Scalability: Encourages a clean structure, making codebases more maintainable.

    Conclusion

    Effective use of Dependency Injection in FastAPI can greatly enhance the maintainability and scalability of your web applications. By embracing DI, you unlock the potential for better organized, cleaner, and efficient code architecture. Whether you are a seasoned developer or a beginner just starting with FastAPI, understanding and utilizing DI is crucial for effective software production.

    Call to Action

    Try integrating dependency injection in your FastAPI applications and see the difference in how you manage code dependencies. For any questions, feel free to reach out or comment below!

  • Exploring Python’s itertools: The Key to Efficient Iteration

    Exploring Python’s itertools: The Key to Efficient Iteration

    Iteration can be a powerful tool when dealing with collections of data. Whether you’re looping through a list of numbers, a string of characters, or even performing complex operations across multiple sets of data, Python’s built-in libraries make these tasks straightforward and efficient. One library that stands out for its versatility and power in iteration tasks is itertools.

    What is itertools?

    Python’s itertools module is a collection of tools for handling iterators. It’s a standard library that offers a suite of fast, memory-efficient tools that are useful by themselves or in combination. These tools allow developers to create iterators with complex control flow, process infinite sequences, and even operate on huge collections without loading entire datasets into memory.

    Getting Started

    To use itertools, you’ll first need to import it into your Python script. Here’s how you can do that:

    import itertools
    

    Basic Itertools Functions

    1. Infinite Iterators

    • count(start=0, step=1): Counts indefinitely from the start number with a specified step.
    • cycle(iterable): Cycles through an iterator indefinitely.
    • repeat(object, times=None): Repeats an object either indefinitely or a specified number of times.

    2. Combinatoric Iterators

    • product(*iterables, repeat=1): Cartesian product of input iterables, equivalent to a nested ‘for-loop’.
    • permutations(iterable, r=None): Returns all possible r-length permutations of elements in the iterable.
    • combinations(iterable, r): Returns all possible r-length combinations of elements in the iterable.
    • combinations_with_replacement(iterable, r): Combinations of r length with repeated elements allowed.

    3. Terminating Iterators

    • accumulate(iterable[, func]): Makes an iterator that returns accumulated sums, or accumulated results of binary functions (specified via func).
    • chain(*iterables): Chains multiple iterables together.
    • compress(data, selectors): Filters elements from data returning only those that have a corresponding selector that evaluates to True.

    Why Use itertools?

    The beauty of itertools lies in its capability to handle data efficiently. By using iterators, it can avoid storing data sets entirely in memory, which is especially useful for dealing with large data sets or streams of data. Likewise, its combinatorial functions facilitate more complex operations like permutations and combinations directly on iterables without any additional overhead.

    Example: Generating Permutations

    Here is a quick example of how easy it is to generate permutations using itertools:

    from itertools import permutations
    
    people = ['Alice', 'Bob', 'Charlie']
    
    for perm in permutations(people):
        print(perm)
    

    This code snippet will produce all possible ordering combinations of the list people.

    Conclusion

    Python’s itertools module is a gem for any developer looking to perform sophisticated iteration tasks with minimal code. Whether you’re manipulating combinations, permutations, or simply cycling through a sequence, itertools provides an efficient and pythonic way to leverage iterable data. By mastering these tools, you can boost the performance of your Python applications while keeping your code neat and understandable.

  • Getting Started with Python: A Beginner’s Guide

    Getting Started with Python: A Beginner’s Guide

    Python, a versatile and powerful programming language, has been gaining popularity due to its simplicity and readability. Whether you’re a seasoned developer or a beginner just stepping into the world of coding, Python offers a welcoming environment that fosters learning and innovation. Today, we’ll explore the foundations of Python,
    a language loved by developers worldwide, and a few reasons why you might want to get started with it too.

    Why Python?

    Python’s syntax is clear and intuitive, similar to writing human-readable English. This makes it an excellent choice for beginners who want to focus on programming concepts rather than getting bogged down by complex syntax. Python is also incredibly versatile, used in web development, data science, artificial intelligence, scientific computing, and even games! This means that once you learn Python, you can apply your skills to a range of different projects and industries.

    Setting Up Your Python Environment

    Before writing your first line of Python code, you need to set up your development environment. Firstly, download and install Python from the official Python website. Python comes bundled with IDLE, a simple Integrated Development and Learning Environment to start writing and testing your code. However, many developers prefer to use more feature-rich environments like PyCharm or Visual Studio Code, which offer advanced features like code suggestion and debugging tools.

    Writing Your First Python Program

    Let’s write a simple Python program to output ‘Hello, World!’. This is a tradition when learning new programming languages.

    # This is a simple Python program
    print("Hello, World!")
    

    Save the file with a .py extension and execute it by opening your terminal or command prompt, navigating to the file’s directory, and running python filename.py. You’ll see ‘Hello, World!’ printed out as a result, and voila, you’ve just written your first Python program!

    Exploring Python Libraries

    One of Python’s major strengths lies in its vast collection of libraries, which allow you to perform complex tasks with minimal code. Whether you’re interested in data analysis with libraries like Pandas and NumPy, or game development with Pygame, there is a Python library that can help you reach your goals faster.

    Conclusion

    Learning Python opens up a world of possibilities, allowing you to bring your ideas to life in multiple domains. Its simplicity, coupled with the support of a vibrant community and a plethora of resources, makes Python an ideal language to start your programming journey.

    Happy coding!

    Let me know your thoughts on this subject or any other Python topics you’d like to learn about in the comments below. I’m excited to help you explore the fascinating world of Python!

  • Mastering the Basics: An Introduction to Git for Beginners

    Mastering the Basics: An Introduction to Git for Beginners

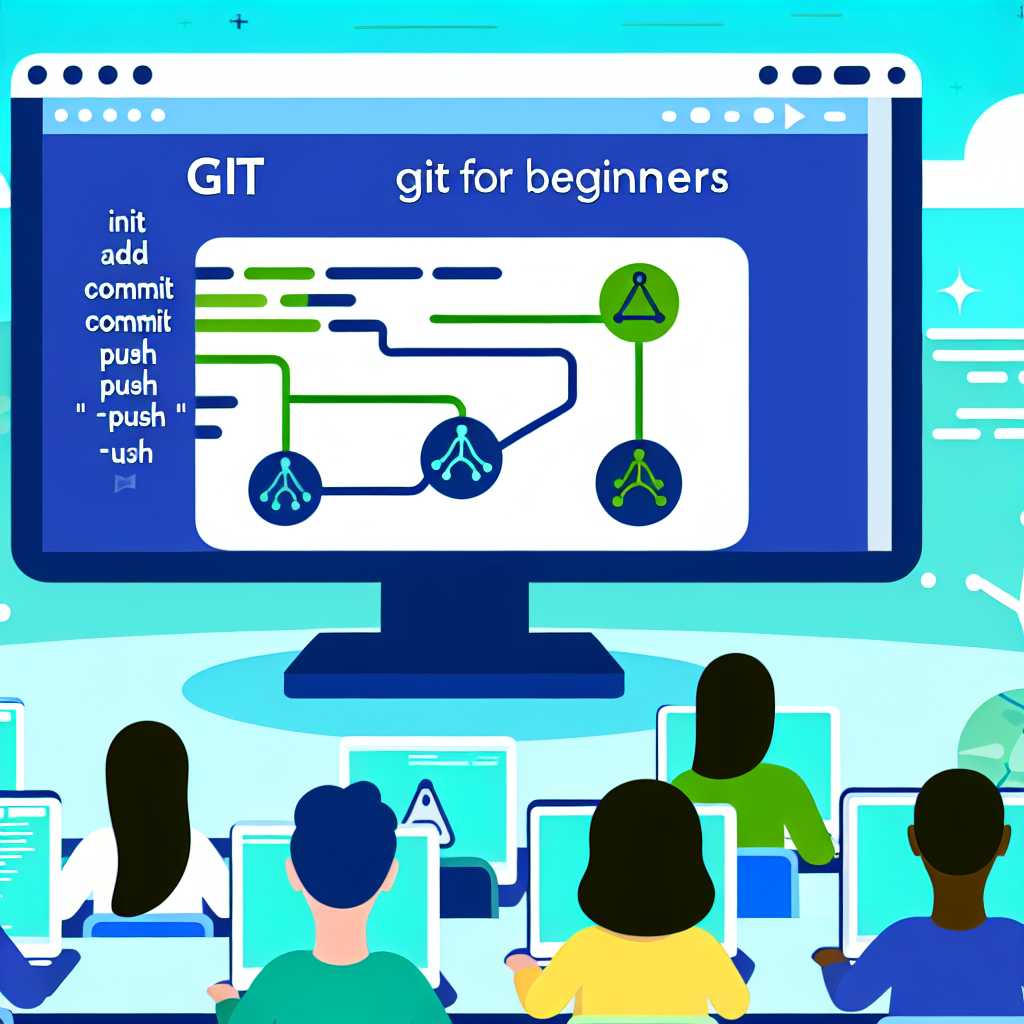
    If you’re a software developer or involved in a project that involves coding, chances are you’ve heard of Git. As a powerful version control system, Git tracks changes in source code during software development. However, getting started can be challenging for beginners. In this article, I will provide you with a concise introduction to Git that will help you understand and utilize it effectively in your projects.

    What is Git?

    Git is a distributed version control system that allows multiple developers to work on the same project without interfering with each other’s changes. Created by Linus Torvalds, it’s known for its speed, efficiency, and robust handling of both small and large projects.

    Getting Started with Git

    To begin working with Git, the first step is installing it on your machine. Git is compatible with various operating systems, including Linux, macOS, and Windows.

    Once installed, it’s essential to set up your configuration to associate commits with your identity. This can be done using two simple commands:

    git config --global user.name "Your Name"
    git config --global user.email "your.email@example.com"
    

    This information will appear in your commits, making it easier to track changes over time.

    Creating a Repository

    A repository, or "repo," is where Git stores your project’s history. You can turn any directory on your computer into a Git repository by navigating to it and running the following command:

    git init
    

    This command creates a new Git repository, allowing you to start tracking changes.

    Basic Commands

    Here are some fundamental commands to help you get started:

    • git add <file>: Stage changes you want to commit.
    • git commit -m "message": Commit your staged changes.
    • git status: Check the status of your working directory.
    • git log: View your project’s commit history.

    Pushing and Pulling Changes

    If you are working in a team, you might want to share your changes on a remote repository like GitHub or GitLab. Use the following commands:

    • git push: Upload changes to a remote repository.
    • git pull: Fetch changes from a remote repository and merge them into your local branch.

    Conclusion

    This introduction covers only the basics, but it should be sufficient to get you started on your Git journey. As you become more familiar with Git, you may want to explore branching, merging, and dealing with conflicts. Remember, mastering Git will significantly enhance your productivity and help you manage your projects more effectively.

    Happy coding!

  • Harnessing the Power of Git: Tips for Efficient Version Control

    As a software engineer, effective version control is crucial for successful project development and collaboration. Git, a powerful tool for version control, can sometimes seem daunting to both new and experienced developers. Luckily, there are a number of strategies and best practices that can help you make the most out of Git in your projects.

    Understanding the Basics

    Before diving into advanced techniques, it’s important to have a strong grasp of Git’s basic commands and workflows. Here are a few essential commands you should master:

    • git init: Start a new Git repository.
    • git clone: Clone an existing repository from a remote server.
    • git commit -m "message": Commit your changes with a descriptive message.
    • git branch: Manage branches within your repository.

    Best Practices

    1. Write Descriptive Commit Messages
      A commit message should convey the purpose of the changes. Start with a short, descriptive title followed by a detailed description if necessary. This clarity is invaluable when reviewing past work.

    2. Use Branches Effectively
      Branching is one of Git’s most powerful features, allowing you to experiment and work independently from the main codebase. Create short-lived branches for new features or bug fixes. This reduces conflicts and makes it easy to integrate changes back into the main branch.

    3. Regular Merges and Rebases
      To keep your branches from diverging too much from the main branch, you should regularly merge or rebase changes. Understand the differences: "merge" combines branches, preserving all commits, while "rebase" reapplies commits on top of another base tip. Each has its use case depending on your workflow preferences.

    4. Leverage Git Hooks
      Git hooks can automate tasks and enhance productivity. These scripts run automatically at certain points (e.g., before a commit) and can be used to enforce coding standards, run tests, or check for simple errors.

    5. Review Pull Requests Thoroughly
      When collaborating, reviewing pull requests is critical to maintaining code quality. Look for potential issues, enforce standards, and encourage well-documented changes.

    Advanced Techniques

    • Use Git Bisect: This command helps you locate the commit that introduced a bug by a process of elimination.

    • Stash Your Changes: If you need to switch branches but aren’t ready to commit your changes, use git stash to temporarily save them without a commit.

    • Git Cherry-pick: Allows you to apply a commit from one branch to another quickly, useful for replicating bug fixes without merging entire branches.

    By mastering these Git techniques and best practices, you’ll be well on your way to becoming a more efficient and effective developer. Not only will your code quality improve, but your ability to collaborate within teams will greatly benefit.

    Let’s continue this journey towards Git mastery! Stay tuned for more articles where we will dive deeper into other areas of Git usage.

  • Mastering Git: Essential Tips for Effective Version Control

    Mastering Git: Essential Tips for Effective Version Control

    As software developers, we rely heavily on version control systems to manage our code, collaborate with teammates, and ensure the integrity of our projects. Git is one of the most popular version control systems, renowned for its distributed nature, robustness, and flexibility. Yet, despite its widespread use, many developers struggle to use Git to its full potential. Here are essential tips to master Git and streamline your development workflow.

    1. Embrace Branching and Merging Strategies

    Branching is one of Git’s core features that allows developers to work on independent lines of development. To maximize its benefits:

    • Use Feature Branches: Isolate your work on new features by creating dedicated feature branches. This keeps changes out of the main codebase until they’re ready.
    • Adopt a Naming Convention: Use clear and consistent naming conventions for branches (e.g., feature/login-page, bugfix/payment-error). This clarity reduces confusion and improves collaboration.
    • Regularly Merge/Rebase: Keep your branches in sync with the main branch by regularly merging or rebasing changes. This minimizes merge conflicts and eases integration when changes are ready.

    2. Commit Often, with Quality Messages

    Frequent commits make it easier to track changes, locate bugs, and revert to previous states if necessary. Here’s how to improve your commit strategy:

    • Commit Small Changes: Break your work into smaller, logical chunks, and commit often to preserve progress and maintain clarity.
    • Write Descriptive Commit Messages: Start with a short summary and follow up with detailed explanations if needed. Good commit messages explain what and why changes were made.

    3. Take Advantage of Git’s Powerful Tools

    Git offers a myriad of robust tools that streamline development processes:

    • Stashing: Use git stash to temporarily save changes that aren’t ready to be committed, allowing you to switch branches without losing work.
    • Cherry-picking: Extract specific commits from one branch and apply them to another using git cherry-pick, invaluable for patching or porting changes.
    • Bisecting: Discover the root cause of bugs efficiently with git bisect, a binary search algorithm to identify problematic commits.

    4. Collaborate Effectively with Pull Requests

    Pull Requests (PRs) are indispensable for collaboration, especially in team settings:

    • Draft Informative Pull Requests: Include a clear description of changes, implementation details, and potential impacts. This facilitates thorough code reviews.
    • Engage in Peer Reviews: Participate actively in reviewing teammates’ code, providing constructive feedback, and learning from others’ perspectives.

    Conclusion

    Mastering Git is not just about learning commands; it’s about adopting practices that improve your development workflow and enhance collaboration. By incorporating these tips, you’ll harness Git’s full capabilities, leading to more efficient, error-free software development.